Monday, December 29, 2008

Mt Diablo 4 Peaks Hike Trip Report

Trip details are given here.

Meetup Link here

My photos here


So I guess you can have a tough hike in the Bay Area. We got off to a bit of a late start, not starting until about 10 am, but not too worried about making it back before sunset.


There are multiple places to start out, but we began around Donner Canyon on the end of Regency Dr. Almost immediately, there were multiple trail branches to choose from. I had a preloaded gps track of the route we wanted to take, which was very useful as I have never seen so many trail choices around a peak in my life!


The trails are a mix of single track and fire roads. We started out pretty flat with some nice views


We veered off to a single track trail toward Eagle Peak, and after a pretty steep climb we gain the ridge head toward Eagle Peak.


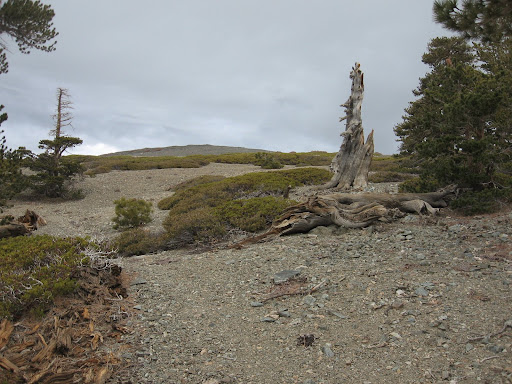
We then descended down the south - south eastern ridge of Eagle Peak to a saddle between it and Mt Diablo. Again multiple trails to choose, and we took the one heading up Bald Ridge aiming straight at Diablo. After a mile or so of muddy trail ascent, the trail veers off and wraps around to a saddle east of the summit. I would have prefered to try to take the ridge straight up to the summit, but did not see any use trail to take.


We reach the sadde east of Mt Diablo. And ice skated


At this point, a summit trail will lead you up about 900 ft in abou 1.2 miles. Instead, I found a use trail heading up to the peak that sure looked steeper.


And it was steep. Those 900 ft came in 0.5 to 0.6 miles! So we summitted Diablo in about 5.5 miles and 3800 ft gain, but there were still 2 peaks to go.


We headed back down the maintained trail to the saddle, then continued east toward North Peak. North Peak is not very pretty with equipment and antennaes on top, but man, it surely has the steepest fire road I have ever been on!


We descended this stupid fire road and headed on another trail to the final peak, Mount Olympia.


We ended by descending a few nice fire roads to complete the loop


In the end, we accumulated about 5400 ft gain in 14 miles! With so many trails, it is easy to figure out other strenuous hikes around Diablo.


website hit counter

Sunday, December 21, 2008

Brown Mountain to Bear Canyon Loop Hike Trip Report

Meetup Link here

My photos here


I had initially been given some requests to make a hike that had 'at least' 5000 ft elevation gain, was steep uphill, not steep downhill, and not too many miles. Well that sounds plenty easy to do, especially given limitations with snow conditions!

I wanted to check out the descent from the ACH and the Ken Burton trail as I had seen its switchbacks every time I drove up the ACH for other hikes. So we drove up the ACH for a short bit until we reached a small turnout on the right around Dark Canyon that has a use trail heading down to Oakwilde. The use trail has some brush but nothing annoying, and though its pretty steep not too bad.


Leveling out close to Oakwilde we heard the pleasant sound of running water.


We reached a junction with the Ken Burton trail, and headed up. The trail is in good condition.


Strawberry Peak to the north:


We reached the junction with Brown Mtn fire road, where there was a bunch of mountain bikers partying it up on some sort of social ride. They asked where we were going, and we pointed and said 'straight up', which they didn't think we could do!


The ascent up the west ridge was quite steep. I really enjoyed it. However, it was quickly concluded by the group that they did not want to go down this way!

We traversed across a few bumps until we reach Brown Mt. where we ate lunch. The cloud layer covered up much of the city but we could see Santiago Peak in the distance.


We continued east, heading up and down the bumps along the way. As we reach the reach and heading east we found snow in increasing amounts. At one point we could see some prints of a big kitty!


We reached Tom Sloane saddle, and decided to head down to Bear Canyon, as looping to the south would require more mileage. In addition, I had never been in Bear Canyon so I thought that would be nice.

The trail down was in great condition although right now some parts have decent snow coverage. Enough to make a snow angel.


It was very lovely at the bottom. Lots of flowing water.


Lots of water!


We met up with the Switzer Falls trail junction, hiked up to the junction with Gabrielino trail, and took it back to Oakwilde.


As we have established, do not take the CCC ridge!


We finished up with the steep 800 ft, 0.6 mile climb back to the cars, for a total of 14 miles and 4800-5000 ft gain. A few nice steep ascents, gradual descents, and lovely hike through Bear Canyon.


Friday, December 19, 2008

Brown Mountain & Mt Lowe via ACH, Ken Burton Trial

Hike Stats

Rating: 8-9 / 10, Advanced
Distance: Up to 15 miles
Elevation Gain: Up to 5000 ft
Estimated Time: Up to 8 hrs
Terrain: Trail & use trail on ridge, potential for dealing with snow

Description

We are going to take an unconventional way for the beginning of the hike. Most hikes around Brown Mountain begin in Millard Canyon; however, I would like to check out some apparent use trails that descend from the Angeles Crest Highway.

We'll descend down Twin Canyon via a use trail that is allegedly in good shape. We'll reach Oakwilde campground (or thereabouts) and meet up with the Ken Burton trail which ascends the west side of Brown. This trail is also apparently in good shape, although a few mountain bikers mentioned some annoying poison oak, so please be aware/prepared.

We'll reach the Brown mtn fire road, and gain the west ridge which we'll take all the way up.


Snow: Reports are that the snow level is somewhere around 4500 ft. So I think we should be able to at least get up to Brown mountain without much trouble. After reaching Brown, we'll descend the east ridge toward Tom Sloane saddle, and then begin a good ascent toward Mt Lowe. This is the one area I am specifically cautious about, as we may begin to pick up more snow and we will be on a ridge, so we will just have to be careful and turn around if the conditions are dangerous.

If we don't make it up to Mt. Lowe, we'll still have done 3500 ft elevation gain, and at least 9 miles. But please be prepared for hiking in some snow!

Trailhead

ACME map of some key points

We will meet at the ACH rideshare point, then we will head up to point "F" on the ACME map.

This is the pulloff we want to reach:


View Larger Map

I'm not sure but I suppose we should have Adventure Pass's to be safe.

Wednesday, December 17, 2008

Accuracy in Estimating Elevation Gain with GPS

The primary factor in determining the amount of energy needed for a hike is the total elevation gain. While being off by a few hundred feet is usually not a big deal, being off by a 1000 ft or more is.

Of course, by looking at topo maps we can certainly get a good enough estimate of how much elevation gain there will be, but with GPS devices people have taken to assessing how much gain they have done on a hike based on what the device spits out.

Now, I have a Garman GPSMAP 60CSx, and probably like most others, Garmin has its own algorithms for taking data and trying to remove the error. However, when people upload to sites like MotionBased, they will spit out a report with extremely high numbers. For example, a hike up to Mt. Diablo in the Bay Area probably takes up to 4500 ft gain, but I was reading some people's comments that they did over 7,000 ft gain! This is problem, what will this person think when someone says they are going to hike a real 7,000 ft hike?

Anyways it's fun to have control over your own data. I looked at the data I collected for the Register Ridge hike from last weekend. I took samples at every second, the highest rate that the device would allow.

Here is an elevation plot of the hike:


Now, let's zoom in on one area, I believe on the saddle between Mt Baldy and West Baldy:


The numbers in the legend indicate the number of points used in averaging for that color line. So the blue, with '0', is the raw data with no averaging. The purple '60' averages using the 60 points to each side of the current data point, and the others use a # of points in between.

Based on visual inspection, we can obviously say that the raw data needs to be smoothed. However, the purple line is too smooth. It looks like the red and cyan curves, with 5-20 points smoothing, gives results that are reasonably smooth without loosing too much information.

We would expect then for the red and cyan curves to give the most accurate estimates of total elevation gain. We would expect the blue (raw) to overestimate and the purple to underestimate. But by how much?


This figure plots the estimate total elevation vs. the # of points used to smooth the data. We can see clearly that as smoothing increases, our gain estimate decreases.

We can also see that as we decrease the smoothing, the estimate increases and at faster and faster rates. Without any smoothing/filtering, the calculated gain would have been some 9,000 ft, around 4,000 ft over the likely actual estimate!

The region is the box is probably the sweet spot where the 'actual' elevation gain lies. I mean 'actual' in the sense how being close to a calculated value based on topo calculation, maybe with a bit more accuracy. The left side of the box shows where the line looks to slow down. 6,000 ft is definitely too high, while 5,000 might be pretty good. Between 10 and 20 looks to give a stable & reasonable estimate.

To go back to the beginning, we need to at least make sure we aren't overestimating or underestimating the gain by 1,000 ft. We are more safe by smoothing with more points than less, but we still want to analyze visually to make sure we aren't smoothing unnecessarily high (60). I believe my gps estimated something like 5300, which in my opinion is a bit too high.

Most of this may only be of interest to a few of you, but the general take home message is: don't automatically trust someone's information on the elevation stats of a hike until you know how they calculated it. With new technology, it's actually more likely that error in reported stats increases.


Monday, December 15, 2008

X-Country to Ski Hut Trail - Video

Just another little snippet of me slipping while traversing north to connect up with the Ski Hut trail where it quickly ascends on the east side of the ridge.


Friday, December 12, 2008

Mt. Baldy via Register Ridge

Meetup Link here

My photos here

Our initial plan was to take Register Ridge up to the Devil's Backbone trail, continue on reaching Mt. Harwood, Mt. Baldy, Dawson, and Pine. However we knew there was going to be snow on the north face of Baldy so we weren't sure about the latter two.


I was also trying on a new pair of shoes. I ordered several pairs from Sierra Trading Post with the intention of trying them all and keeping one pair. Last week was the Salomon Solaris, which was good except for poor lateral support - an important feature on cross-country hikes like Rattlesnake Peak.

This week I was trying the Asolo Veloce. A nice looking pair with Vibram soles, but with stiff soles I wasn't sure how well they would break in during the first hike.


Anyways, we were off a bit past 8am, and once hitting the Ski Hut trail, we quickly diverged onto the clearly worn Register Ridge use trail.


Of course, this is a steep path. But it is a good steep, the terrain for footing is reasonable. And I always enjoy hiking around fallen pine needles, as they pad the feet and smell nice.


Here is a video of some ridge ascent around an area with large boulders:


The view south of course gives clear views down the canyon. On this day, there were some interesting views due to cloud cover and light rays pouring through.


At this point, we reached the Devil's Backbone Trail. We just scaled about 2700 ft in 1.5 miles up the ridge, and about 3000 ft in 2.5 miles total! We took a short break then headed up straight toward Mt Harwood.


However as we were approaching the backbone trail and then on to Harwood, it began hailing on us. And the weather around looked somewhat formidable, although clear skies were not too far away.


After bagging Harwood, we decided to mix it up just a bit and veer toward the northeast face of Baldy to ascend instead of the normal east route. This provided more of a workout dealing with the scree and scrambling.


We then ascended to some really cool views.


Once we had ascended Register Ridge, it was really, really windy. And initially there was no sun. Luckily the sun finally came out to provide some warmth and to counterbalance the wind.

We started heading down toward Dawson, but after a few hundred feet down found the entire face covered in snow up to 1 ft deep. The snow could be traversed in the current condition, but I wasn't sure how it would act (freezing) later on the return so we decided to bail out on that portion of the trip. However, it might have been possible to avoid the snow if one stays as far west on the ridge as possible, as there was less to no snow there.

Instead, we hiked back up and over to West Baldy, and went down several hundred feet toward the San Antonio ridge. It looked really inviting, but that's for another day.

So we turned around and traversed over toward the Ski Hut trail. We decided to check out those airplane crash sites.


I'll assume someone put this here and it didn't land this way!


We then descended traversed along the western side of the ridge until we hit the saddle where the Ski Hut trail veers down easterly. Instead we continued on the ridge for a while to check it out. After some descent, we traversed across the side of the ridge to meet back up with the Ski Hut trail.


We met up with the trail, and followed it back to the cars.


In the end, this was about a 10 mile, 5000 ft jaunt with major cross-country portions. While we didn't get to Dawson & Pine, we saw some great views and had some great hiking.